Installing the 3CX Client for Android
Introduction
The ability for employees to work remotely is becoming more of a necessity than ever before. In an age where technology has made it possible to work remotely via the Internet; 3CX brings office calls home through your Android device. The 3CX Client for Android allows you to make and receive office calls on an Android device directly from your office extension at no additional cost.The 3CX Client for Android possesses a user-friendly interface allowing the transfer of calls, the creation of conference calls, the ability to view the status of colleagues and control your own status from wherever you are. There’s no need to give out your personal mobile number anymore either!
System Requirements
The 3CX client for Android is supported on the following Android versions:

Installing and Configuring The 3CX Client for Android
- Go to Google Play Store, and search for “3CX”.
- Tap “Install” and “Accept” for the application rights. The 3CX client for Android will be downloaded and the installation procedure will begin.
- Once the installation is completed you will have to “Agree” with the Licence Agreement.
- A message will appear confirming that your 3CX client for Android has been installed. Follow the instructions provided in the configuration wizard.
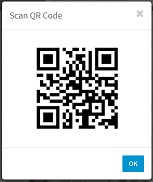
- Go to your 3CX Web Client. In the top right corner click on your profile picture and a drop down menu will appear. Click on Scan QR Code.

- A pop up will appear with your extension’s QR code. Now scan the QR code with your Android device and the client will be automatically configured.
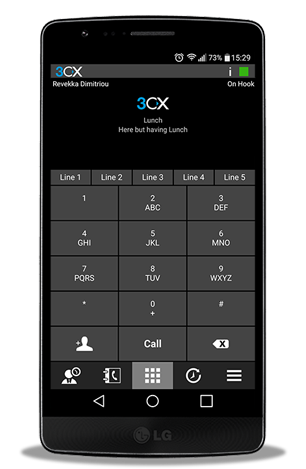
- Once configuration is complete, you will see the Available status in the dial screen and On Hook in the right upper corner. You can now start making calls.
Settings
Once the installation and configuration is completed, you can personalize your 3CX Client by tapping on the “Settings” in the “More” button
  . In this section, you can set your audio and video options, choose between WiFi and 3G connectivity or even change your theme. Let’s have a closer look at the options provided below:
- Accounts: From within the accounts you may select which account you want to use. Additionally you may edit, remove or add accounts, use “Audio Codes” and more. IMPORTANT: Do not modify these settings unless you are advised to do so by your administrator. Note: You can edit your account by tapping your Name on the upper left corner of the dial screen.
- Audio Options: You can specify your Audio options and devices. As a matter the default settings are already optimized, however if amendments are required, they can be done via the Audio Options and Audio Devices
- Echo cancellation: When enabled, it will minimize any echo heard during calls
- Silence Detection: When enabled, the 3CX client will conserve bandwidth by not sending data when detecting silence. This might impede quality when enabled.
- Microphone Gain: If the other party cannot hear you clearly, you can increase your microphone gain to amplify the volume of your voice.
- Microphone Source: In some devices the microphone might not work in the default “Advanced mode,” in which case switching to “Basic mode” will enable it.
- Audio subsystem: The default option is “OpenSL”. If you experience some audio issues, then please switch to Java.
- Advanced Settings
- Local SIP Port: Default is empty. When using the default setting, 3CX will use a random port provided by the system to pass SIP traffic through. If you would like to change this contact your administrator.
- Lock Wi-Fi: Keeps Wi-Fi awake when the screen is turned off in order for 3CX to receive calls in the background.
- Enable 3G: Allows 3CX to use 3G connectivity to make calls when Wifi is not available.
- Full Screen: Hides the Android statusbar to use more screen space.
- Proximity Sensor: If your device is equipped with a proximity sensor, 3CX will switch off the display when you put the phone to your ear during a call.
- Keypad Tone: When enabled, 3CX will play dial tones when dialing a number.
- Use System Ringtone: When enabled, you can set a different ringtone to use for 3CX.
- Ringtone: Select the ringtone that will play when you receive a call in 3CX.
- Verbose Logging: Logs debugging information so a detailed log report is created for submission to our support team.
- Send Log Report: Send a log report to 3CX Support to troubleshoot potential issues.
- About: Go to About to determine which Version of 3CX Client for Android is currently in use.
Tips:
- Register: If the client is having difficulties connecting to your PBX or is not registering, you can select this option to automatically re-provision the 3CX Client.
- Request Welcome Email: Use this option when you require a fresh Welcome Email to be resent to your inbox by the administrator. Furthermore, you may retrieve other types of sensitive data such as your voicemail number or PIN number.
- Language: The 3CX client uses your phone’s default language. If you want to change the language you will have to do so from your phone settings.